Saturday, June 22, 2013

Cherry Wine Sauce

I went cherry picking.

The cherries are SO good.  I picked about 11 pounds of 2 kinds.

Now, what do I do with them?


I went cherry picking with a few people including my friend Daniel. He's a foodie too.  He is our boy's Science tutor.

He mentioned Cherry Wine sauce.

Inspiration hit.


I love being inspired.  I've been pretty tired lately and then I just don't really feel like cooking.

But, really. Cherry wine sauce sounded easy and delicious.

I have a bottle of Cabernet wine sitting on my counter top that needed to be used up and it was past it's prime for just drinking.

But this is a perfect use for it.


What you need:
Cherries, Wine, Shallots, Garlic, Chicken broth, and rubbed rosemary.

You can feel free to substitute.  I'm pretty sure you can't go wrong.


Wash and pit the cherries.

Heat a saucepan and melt a bit of butter. Add 2 minced shallots. Cook till browned. Add one minced garlic clove, and a few splashes of chicken broth.

Add about 2 cups of cherries in the saucepan with one cup of wine.

Cook till the cherries begin to bubble and break down.  Drizzle in some more Chicken Broth if it starts to look like it needs more liquid.

Add 1/4 teaspoon rubbed rosemary.


Serve over your favorite meat and/or vegetables.

Pictured is Turkey Picatta


You know it's good when your pickiest children INHALE it!

Cherry Wine Sauce
2 cups fresh cherries, pitted
1 cup wine
2 shallots, minced
1 garlic clove, minced
1/4 teaspoon rubbed rosemary
1 cup Chicken Broth

1.Wash and pit the cherries.

2. Heat a saucepan and melt a bit of butter. Add 2 minced shallots. Cook till browned. Add one minced garlic clove, and a few splashes of chicken broth.

3. Add about 2 cups of cherries in the saucepan with one cup of wine.

4. Cook till the cherries begin to bubble and break down.  Drizzle in some more Chicken Broth if it starts to look like it needs more liquid.

5. Add 1/4 teaspoon rubbed rosemary.

6. Serve


The Lunch Lady

Thursday, June 20, 2013

First Lettuce from the Garden!


I really try to eat salad for both lunch and dinner. Try being the operative word.

I was SO excited to notice that my mesclun lettuce is finally big enough to start cutting!


We've had a rather cool and wet late spring and my garden hasn't really taken off yet.

Everything is growing but the plants haven't started to produce.


We started all our lettuces and greens from seed this year.

Patience is a virtue. I'm learning.

But, at last, the mesclun, butterhead, arugula, and baby swiss chard are ready to culitivate.


What's growing in your garden?

The Lunch Lady
Monday, June 17, 2013

Squid Dogs


Lunchtime is always fun.  The age-old question of "what are we eating for lunch?" happens every day.

Some days (like the day after food shopping, I'm FULL of ideas) I just open the fridge and stare.

And stare.

Today, I saw a package of uncured, all beef hotdogs, and thought..."Aha! Squid dogs!"


This was a fun treat when the boys were little.

But, hey! You're never too old for squid dogs.

(This guy looks like he has his mouth open)


These are super simple to prepare.

Heat up a pot of water to boiling on the stove.

Take each hot dog and slice down the length leaving a "one inch" for the "head" of the squid.

Make 2 slices down so you have "four legs."


Don't worry if the "legs" just resume hot dog position.

Once you place them in the hot water, they will open up.


Boil or heat for a few minutes till they look like the pictures.

Serve with your favorite condiments.

Your kids will think you are "The Coolest"

You're welcome,

The Lunch Lady
Saturday, June 15, 2013

Square Foot Gardening Explained


I make my plants "toe the line."

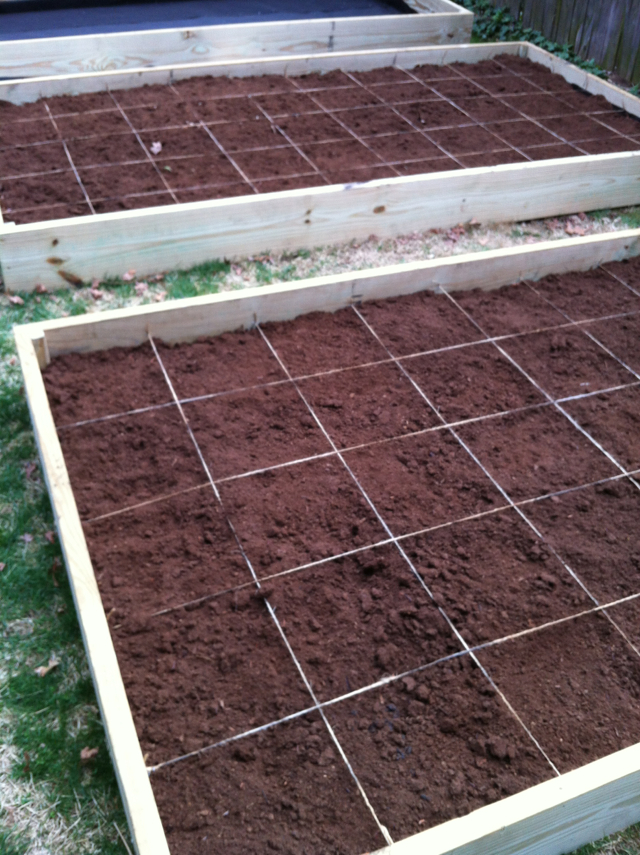
A line of jute.

Square Gardening is a great way to do Raised Bed Gardening because it offers the backyard gardener a way to fit a lot of plants into a small & more compact space.

I confess that I didn't know much about it either till I saw it on Pinterest.

So far, I LOVE it!.


It's a great concept. It minimizes weeds, gives your plants sufficient space to grow, and makes everything neat and tidy.

I like neat and tidy.

Every square is 12" by 12" which is an "American square foot" for all of you lovely non-Americans that (actually) read my blog. (Hellooo! I'm glad you are here!)

That is 30.48 cm by 30.48 cm.  As much as I love the metric system, I think I like the "foot" idea a bit better here.


The idea is that each square foot is allotted "so many" plants depending on the type of vegetable. For example, you can plant 9 beets, 9 beans, 9 peas, but only 1 tomato, 1 pepper, 1 zucchini.  (There are PLENTY of charts out there if you need specific vegetable information.)

So the plants that get rather large need all the nutrients in that square foot of garden.


Every plant has their own spot which is quite handy when you first plant them and they are bit hard to recognize. I made a chart on paper and marked off where, when, and what I planted.  We used the chart for the younger boys "Science" homeschooling project.


Some vegetables, like Mesclun lettuce, are sprinkled liberally.  I try to plant different squares at different weeks so that I have a constant source of certain vegetables.  I planted the beans 1-2 weeks apart.


I planted a lot of vegetables from seed but unfortunately, all my tomato plants got stunted so I bought a few from an organic farm.

Next year, I'm pretty sure I'm just going to buy a bunch of my plants already started, such as all my tomatoes and peppers.

Another great idea is "Companion Planting."  More to come on that later!

The Lunch Lady
Friday, June 14, 2013

Raised Garden Beds

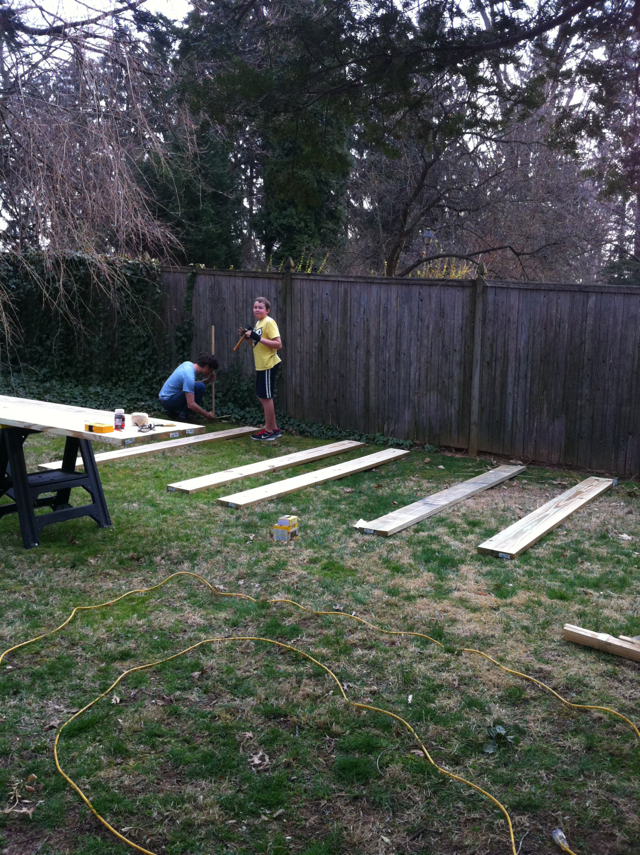
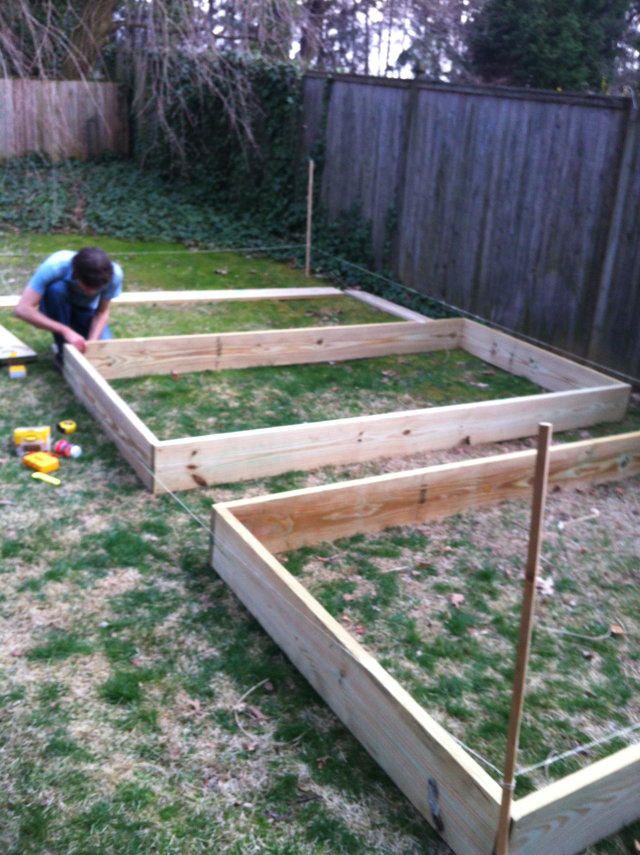
I have an INCREDIBLY handy husband. For weeks, I was pinning raised garden bed ideas on Pinterest. He takes one look at a picture and pretty much knows exactly what to do. Mind baffling.


 We took a late-night trip to Home Depot which, unfortunately, was qualifying as a mini-date for us because of his busyness lately.
I'll take what I can get!


We turned this into our Science Project for the younger 2 boys that we are homeschooling. Everyone helped!


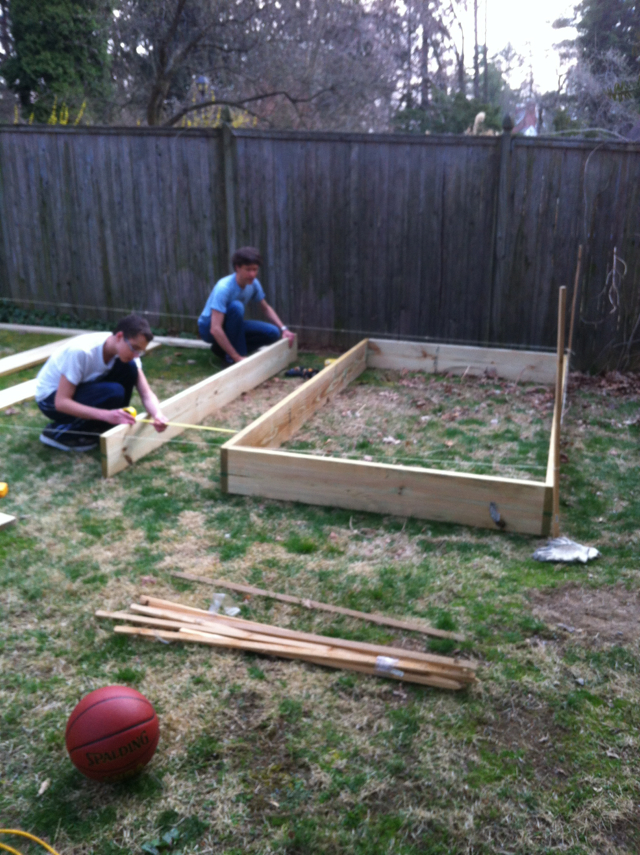
We decided on building 3 boxes that are each 50 sq ft.

There's some math, engineering, and physics involved here!

And a random basketball.


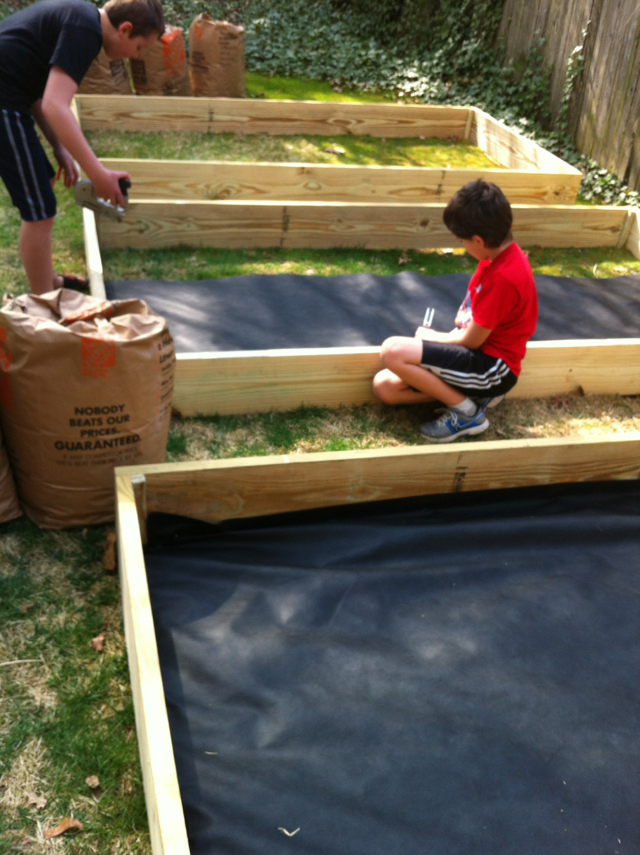
Once the boxes were built, the younger 2 boys and I grabbed some staple guns & leftover landscaping cloth we had sitting in the shed


We cut and stapled the cloth to fit into the bottom of the box, right over the current grass.
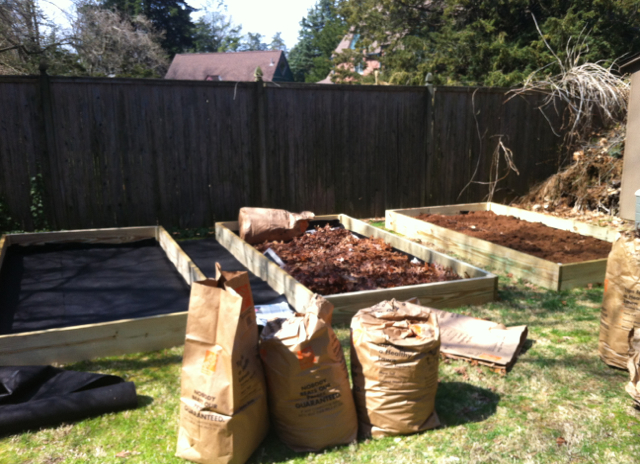
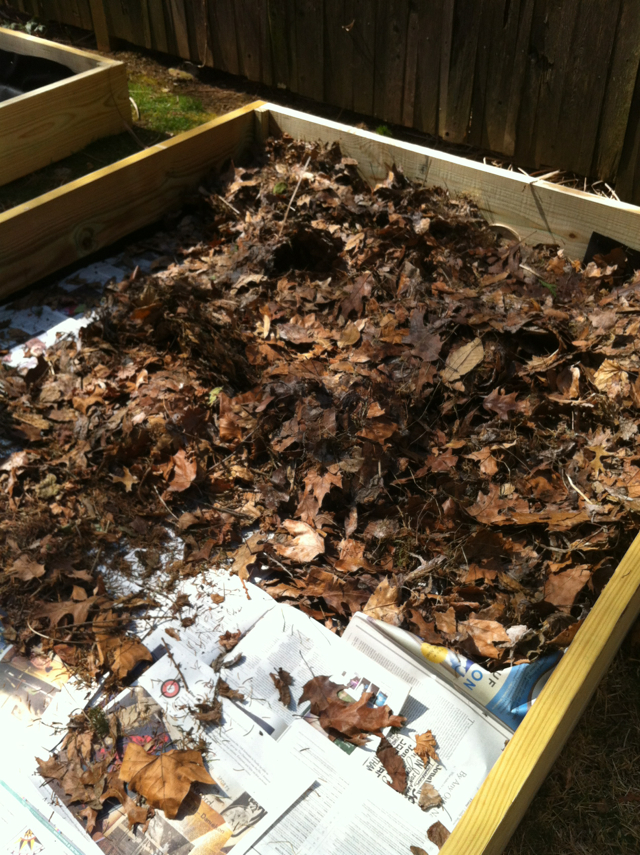
Our goal was to use the "Lasagna Method" for our raised bed gardens, adding layers that decompose over time. This gives us control over the quality of the soil and limits weeds.


Next, we dumped in about 3-4 bags of leftover bagged leaves from the previous Fall. They had been stored in our shed. We kind of missed putting them all out for leaf pickup. What a happy accident!

Leaves are a great base for these beds. They will decompose over time but provide nice aeration for the roots right now.


I also added a layer of newspaper before the leaves went in. 


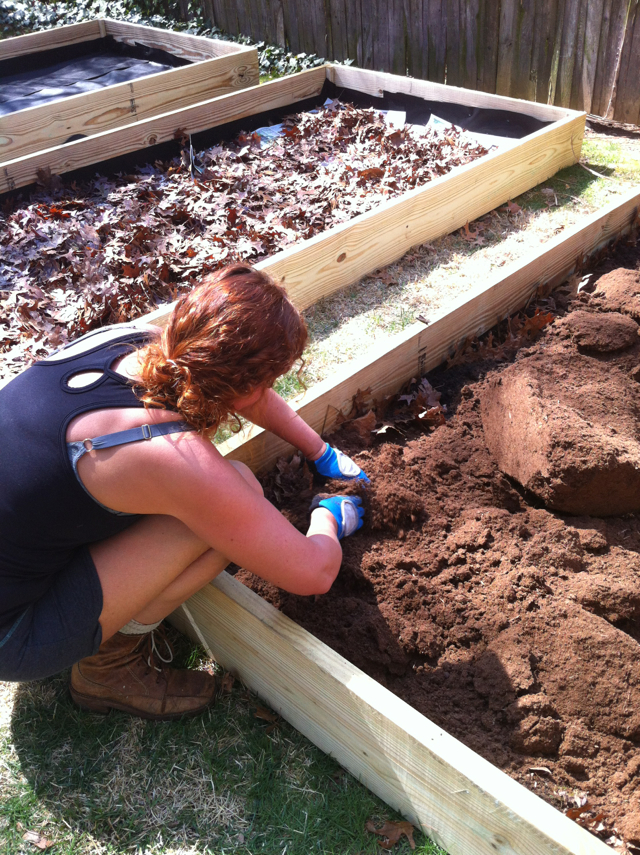
The next 2 layers are peat moss and organic garden soil. I used several bags of each making the top layer all peat moss.


Of course, I picked the hottest day in April to work on this, the week we had unusual 90 degree weather!


Our next project, for another day, was to take some leftover jute string and staple it in one foot squares across the box.

More on square foot gardening next time!

The Lunch Lady

Thursday, June 13, 2013

Organic Strawberry Cream Cheese Spread - Homemade


You know how many times I've paused in the refrigerated section of my local food store to look at strawberry cream cheese? WAY too many times and I never NEVER buy it because it's loaded with food coloring and preservatives.

Ugh. NOT my thing (if you know me even a little bit by now.)

My youngest son LOVES flavored cream cheese for on his bagels but I never buy them.

Now I won't need too.


I happened to have a block of organic cream cheese in my fridge.  It was for the cheese cake I never get around to making.

And, I just made this killer yummy Strawberry Jam. Why not mix the two?


Add a dollop of jam (who measures anyway?) to a half block of cream cheese and mix it with a fork.

Let a sit for a bit and the flavors will meld nicely!

Smear on your favorite bagel.

The Lunch Lady


Wednesday, June 12, 2013

Strawberry Rhubarb Crisp

 Thanks to my neighbor for sharing her recipe, I'm also called this "Carol's Crisp."


One of the BEST things about moving to a new house (besides more space, an awesome house with loads of character, and proximity to shopping) is my new NEIGHBOR.

I love my neighbor.

And she loves to cook. Enough said.

She's one of those people that you can knock on the door and borrow a cup of sugar from. I've ALWAYS wanted one of the neighbors.  In this case, I borrowed the entire recipe.

I stopped over for something last week and she had just pulled this out of the oven. Honestly, I've never been a rhubarb fan.  I've tried it several times in my youth. But when your neighbor offers ya food ya can't refuse. Boy am I glad that I tried it. Yum!


It's rather simple which fits my cooking/baking style.

Beautiful fresh strawberries. You need about 2 cups. These were picked last week at our local berry farm. I had to do something with all those 25 pounds of berries!

Whole oats. I prefer to use organic.


Rhubarb.  I found these "beauties" at our local farm market.

Organic rhubarb!

It's crazy looking. Treat it a bit like celery when you clean and chop it. Wash and peel, then chop.


You also need sugar, butter, and flour.

I used all organic brown sugar, organic butter, and organic spelt flour.


I got these ramekins for a steal at my local TJ Maxx.  A Mother's Day clearance shopping find. My favorite kind.

You can bake the crisp in a 8 x 8 inch glass baking pan.


Strawberry Rhubarb Crisp
2 cups strawberries, washed, hulled, and sliced
2 cups rhubarb, washed, peeled, and sliced
3/4 cup brown sugar
1/3 cup butter
1/2 cup spelt flour
1/2 cup oats
1 tsp cinnamon
1/2 tsp ginger

Preheat the oven to 350 degrees F
Spray an 8 x 8 inch glass dish
Add fruit.
Make the topping. Mix dry ingredients and cut in the butter till chunky.
Bake 30-40 minutes till bubbly.

I may or may not have topped mine with a nice big dollop of whipped cream.

The Lunch Lady
Tuesday, June 11, 2013

Old Fashioned No Pectin Strawberry Jam


25 pounds of strawberries later, I'm getting creative.

I went to two different stores to look for Low Sugar Sure-Jel and they didn't carry it.

That's about as far as I'll go for pectin.  The next step was to Google "No Pectin strawberry jam."


There are QUITE a few recipes out there, of course, that could be because our grandmas and great grandmas probably didn't have the luxury of buying pectin.

I'm not sure that my grandmother ever canned jam, or anything else for that matter. I just don't know.

I do know that my one grandmother had blackberry patches so she MAY have made jam.  I only got to see her once a year, but that's for a very good reason, she lived in Holland and I lived in the U.S.

I have a great memory of being very young and picking berries across from her house.

Over the years the bushes were removed.


I like to think that this happy memory has moved me to have my own raspberry bushes.  We moved last August from about a one acre property FULL of wild black raspberry and red raspberry (wine berry) bushes.  I transplanted about 18 bushes to my new house.

I'm a die hard fan.


My boys are big fans of strawberry jam.

I've made it for several years in a row and missed last year because we were prepping the house for a move and didn't get a chance to go strawberry picking.

We solved that problem this year.


The nice thing about this jam is that is SO incredibly easy to make.

Wash and hull the strawberries.

Put in a pot and add sugar.

Stir, cook on low, stir, cook, stir, mash.


I like to freeze my jam so I don't bother with canning it.

There is plethora of sites that explain how to can it.

Happy googling!


Simple Strawberry Jam

8 cups of local strawberries
3-3 1/2 cups of organic sugar
4 pint jars and lids

Clean and hull the strawberries. I left them whole and mashed them. You can also puree them in a food processor.
Add sugar.
Cook on low up to 2 hours till thickened a bit.
Stir and mash as needed.
Cool and pour into sterilized jars and top with sterilized lids. Freeze when completely cooled. Or refrigerate for up to 2 weeks. (Ours never last that long!)

Tips: leave the whites on the strawberry tushes. It helps thicken the jam with natural pectin.
This jam will be thinner than store bought and will noticeably thicken when refrigerated.
I like to use Trader Joe's (for us Americans) jam  and organic mayo jars. The lids from the their mayonnaise are great lids for using in the freezer. Usually they are gold or royal blue. I run them through the dishwasher and save them. They fit on all regular canning jars. I also use them for my lacto-fermented salsa. It's a great way to recycle but you can't use them for water bath canning because they can break. (Yes, I speak from experience!)

Enjoy!

The Lunch Lady
Monday, June 10, 2013

Simple Caprese Salad


We recently traveled to Colorado as a family.

A family of 6. Four boys. Three meals a day.

You do the math.


So, we eat in a lot.

I enjoy cooking and so does my hubby so we try to share the task.

The beautiful thing about Colorado, which was TOTALLY unexpected for me, is that even up in the high high mountains, they have an AMAZING variety of organic produce and greens. WAY more than the farmy state of PA where I reside.

I'm still a big boggled by it.


So, I found these amazing organic microgreens for NINETY-NINE cents!  They are 2 kinds. A mixture of alfafa, broccoli, and basil microgreens.

I thought, "Perfect!" Let's make caprese salad.


Gorgeous red tomatoes, fresh mozzarella, microgreens, fresh ground pepper, and a spritz of olive oil and vinegar.


Fresh, delicious, and my boys all love it.


I miss these mountains.


I miss those ingredients!


It's so simple to make beautiful food that's good and fresh.

Great for company!

The Lunch Lady