

Warning: It's takes almost all the peppers you see here to make 3 pints.
Yep, I said three. They're packed full, but only three.
Note: This method is for preserving without needing to pressure can or use a water bath. These are preserved with salt, vinegar, and olive oil. You can also skip the salt and just freeze them in baggies or containers. I found this method here.

My foodie friend Sheila was visiting last week for a few days and she bought me this bushel of peppers.
We "split" it meaning she took 1/4 and left me the 3/4.
Besides the obvious eating them raw...I was perusing blogs to see if I could do something else with them...and Roasted Peppers won.
So fasten your seat belts.
It's not difficult. (Nothing I do really is. I'm all about simple stuff in the kitchen.)

Traditionally, folks like to "blister" their peppers whole but I found one website that cut them up in 4 slices and just charred the skin side on the grill.
This sounded like a great idea.
Besides, one of the peppers was rotten inside so I didn't want to chance roasting a whole rotten pepper to find out after the fact.
Gross.
Waste of time.

Liam, (boy, age 13 1/2) my wonderfully helpful guy in the kitchen when it comes to making salad and all things raw vegetable
We were done in no time at all.
I love kitchen help.
I love boy kitchen help.
Such wonderful quality time together. I think he is going to look

Lance (boy, age 11.75) is my grill guy.
He turned it on and cleaned it.
Every little bit helps.

Spray the grill and place the peppers skin side down. High heat. We want to char these suckers.
I had to rotate them around every 5 minutes since my grill prefers to be at it's hottest on the mid to left side.
I tried to leave them alone with the lid down for at least 5 minutes at a time to get a good char.

Once they are blackened, remove from the grill.
The skins remove easily if you let them steam and cool down in a brown bag.
I put a pyrex dish in the bottom to catch any juices.

Roll it up between pepper extrications.
I made that up.
I don't know what else to call it.

See the nice char?
Don't be afraid of the black.
You won't eat it.

A bag full of smoky goodness.

I donned my food gloves. I don't like having to wash my fingers every 2 seconds.
Gross.

Rub, peel, remove all of the blackened skins.
DON'T, I repeat, DO NOT rinse the peppers.
You'll wash off goodness and flavor.
Little black bits are okay my friend.

Once you have de-skinned these beauties...


You need to dredge the pieces of pepper in the vinegar, both sides...


Stir and salt again.

In a few clean canning jars, pour a small amount of vinegar, just to cover the bottom of the jar.

See? I thought I would need 6 jars.
Was I wrong!
I actually had enough for 3 1/2 so I made a puree with the last half jar.

Start filling the jars.

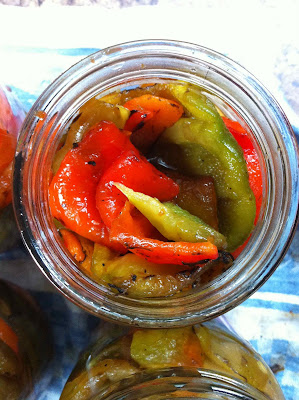
Pretty!

You'll have some juice left over.
Divvy it up amongst the jars. (sorry, my Olde English is kicking in)

Press the peppers down.
Use a chop stick to remove air bubbles.
Add a bit of olive oil to fill up the jar to cover the peppers, up to 1/4 inch from the top.

I added a few slivers of garlic to the top.
It can't be helped.
I'm on a garlic kick.


Enjoy!
The Lunch Lady
Note: All pictures taken with IPhone 4. Not bad eh?
No comments:
Post a Comment